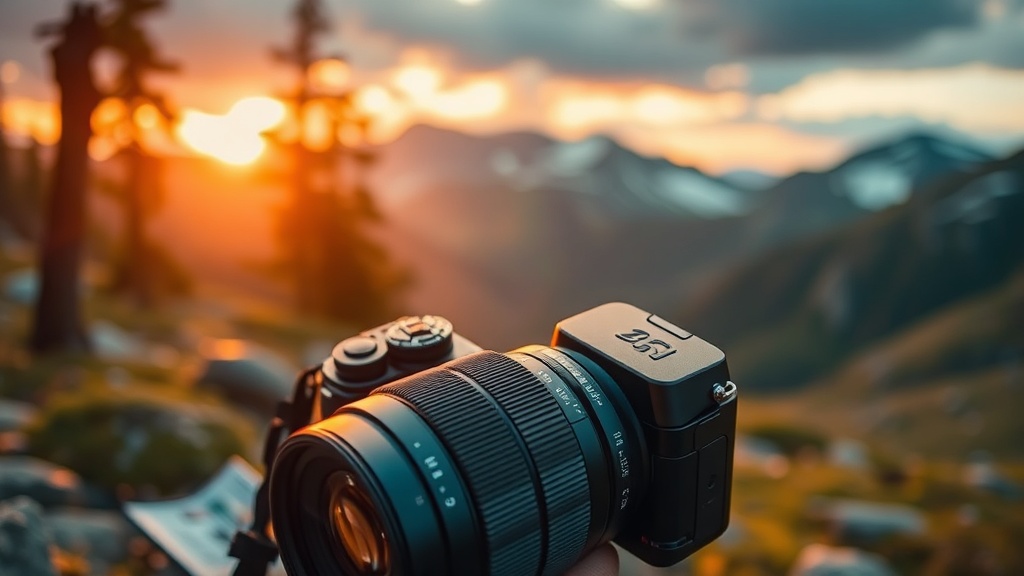
Why You Should Pack a High-Quality Camera for Your Next Trek

A single shot of the Milky Way over the Salt Flats in Uyuni, Bolivia, reveals details that a smartphone sensor simply cannot capture: the subtle gradient of the starlight, the crispness of the horizon, and the deep, textured shadows of the salt crust. This guide outlines why investing in a high-quality dedicated camera system is a critical component of trek planning, focusing on technical requirements, weight-to-utility ratios, and the specific environmental challenges encountered in remote locations.
The Technical Limitations of Mobile Photography in Remote Terrains
While modern smartphones have improved, they rely heavily on computational photography—software-driven processing that attempts to fix hardware limitations. In high-altitude or low-light environments, such as the high Andes of Peru, this software often fails. The lack of a physical sensor allows for "noise" or graininess in low light, which ruins high-resolution landscapes. A dedicated camera with a full-frame or APS-C sensor provides the raw data necessary to capture expansive vistas without losing detail in the shadows.
Furthermore, the optical zoom of a phone is often a digital crop, which degrades image quality. If you are tracking wildlife on a trek through the Serengeti or attempting to capture a distant mountain peak in the Dolomites, a camera with a physical telephoto lens maintains edge-to-edge sharpness. This distinction is the difference between a blurry souvenir and a professional-grade document of your journey.
Sensor Size and Dynamic Range
Dynamic range refers to a camera's ability to capture detail in both the brightest highlights and the darkest shadows simultaneously. When trekking through dense forests or climbing toward a sun-drenched ridge, the contrast is extreme. A high-quality camera, such as the Sony α7R V or the Nikon Z8, offers a much wider dynamic range than a mobile device. This allows you to recover details in a bright sky without losing the texture of a dark rock face during post-processing.
- Full-Frame Sensors: Best for landscape photographers requiring maximum detail and low-light performance.
- APS-C Sensors: A strategic middle ground for trekkers who need to save weight without sacrificing significant image quality.
- Micro Four Thirds: Ideal for long-distance hiking where every ounce in the backpack matters, offering excellent stabilization and smaller lenses.
Environmental Durability and Weather Sealing
Trekking often involves unpredictable weather patterns. A sudden downpour in the Scottish Highlands or fine dust in the Sahara Desert can be fatal to non-specialized electronics. High-quality cameras are built with weather sealing—rubber gaskets and specialized coatings that protect the internal components from moisture and grit.
When selecting gear, look for the IP (Ingress Protection) rating or explicit mentions of weather sealing in the manufacturer's specifications. For instance, the Fujifilm X-T5 is widely cited for its robust build quality in damp environments. Relying on a smartphone, which lacks the ruggedized architecture of a professional camera, increases the risk of a total equipment failure when you are miles away from the nearest outpost.
Protecting Your Gear in the Field
Even with weather-sealed equipment, proactive protection is a requirement for successful travel photography. Use the following items to supplement your camera kit:
- Dry Bags: A 10L or 20L dry bag (such as those from Sea to Summit) ensures your camera and lenses remain dry inside your backpack during heavy rain.
- Silica Gel Packets: Keep these in your camera bag to absorb residual moisture and prevent lens fungus in humid climates like Southeast Asia.
- Lens Cleaning Kits: A dedicated blower and microfiber cloth are essential for removing dust and salt spray from your lens elements.
The Importance of Optical Lenses Over Digital Zoom
In travel photography, the lens is often more important than the camera body itself. A high-quality lens utilizes glass elements to bend light, whereas a smartphone uses software to stretch pixels. This distinction is vital when documenting the intricate architecture of a location or the subtle textures of a landscape.
Prime Lenses vs. Zoom Lenses
Deciding between a prime lens (a fixed focal length) and a zoom lens depends on your trekking style. If your goal is to capture the vastness of a mountain range, a wide-angle prime like a 35mm f/1.4 provides exceptional sharpness and a wide aperture for low-light shots. If you prefer versatility and want to avoid carrying multiple pieces of glass, a high-quality zoom lens like the 24-70mm f/2.8 is the industry standard for multi-purpose travel.
Key Considerations for Lens Choice:
- Aperture: A wider aperture (lower f-number) allows more light into the sensor, which is crucial for sunrise and sunset photography.
- Weight: A heavy constant-aperture zoom lens provides versatility but adds significant strain to your pack.
- Focal Length: Wide angles (16mm-35mm) are for landscapes; telephoto lenses (70mm-200mm+) are for wildlife and compression effects.
Weight Management and Ergonomics
The primary argument against carrying a professional camera on a trek is the weight. A heavy kit can lead to fatigue and impact your pace. To mitigate this, you must adopt a disciplined approach to gear selection and organization.
The "One Bag" Philosophy
Instead of carrying multiple bodies and a dozen lenses, professional travel photographers often utilize the "one bag" method. This involves choosing one versatile camera body and two highly specialized lenses. For example, a trek through the Japanese Alps might only require a Sony a6400 with a 16-50mm kit lens for general shots and a 70-300mm lens for distant scenery. This reduces the number of items you need to manage and protects your back during long ascents.
Optimizing Your Carry System
How you carry your camera is just as important as what you carry. A standard backpack is often insufficient for quick access. Consider these specialized options:
- Capture Clips: The Peak Design Capture Clip allows you to attach your camera directly to your backpack strap, keeping it accessible but secure.
- Dedicated Camera Inserts: Instead of a dedicated camera bag, use a padded ICU (Internal Camera Unit) inside your existing hiking pack to maximize space efficiency.
- Weight Distribution: Always place your heaviest gear (camera bodies and large lenses) close to your spine and centered in your pack to maintain a stable center of gravity.
Power Management in Remote Locations
A high-quality camera consumes significantly more power than a smartphone, especially when using the electronic viewfinder (EVF) or continuous autofocus. In remote areas where electricity is unavailable, your power strategy is a critical part of your logistics planning.
Do not rely on the single battery that comes with your camera. For a multi-day trek, you should carry at least three spare batteries. If you are using a mirrorless system like the Canon EOS R series, ensure you have a way to recharge them in the field. Solar chargers, such as the Goal Zero Nomad series, are effective for long-term expeditions, but they require a stable, sunny location to function efficiently. For shorter treks, a high-capacity power bank (20,000mAh or higher) with USB-C PD (Power Delivery) support can recharge your camera via a compatible adapter.
Investment and Long-Term Value
While the initial cost of a high-quality camera system is higher than a mobile device, the value lies in the longevity and the quality of the output. A professional-grade camera is an investment in your ability to document and preserve your experiences with precision. When you return from a trek, the ability to print a large-scale landscape or share a high-resolution image that maintains its integrity on a large screen is the ultimate reward for the extra weight carried.
Before your next trip, audit your gear. If your current equipment cannot handle the light, the weather, or the physical demands of your destination, it is time to upgrade to a system built for the rigors of the trail.